


Up to 5-Year Part Warranty
Need Replacement Parts?
Download Guides
Title
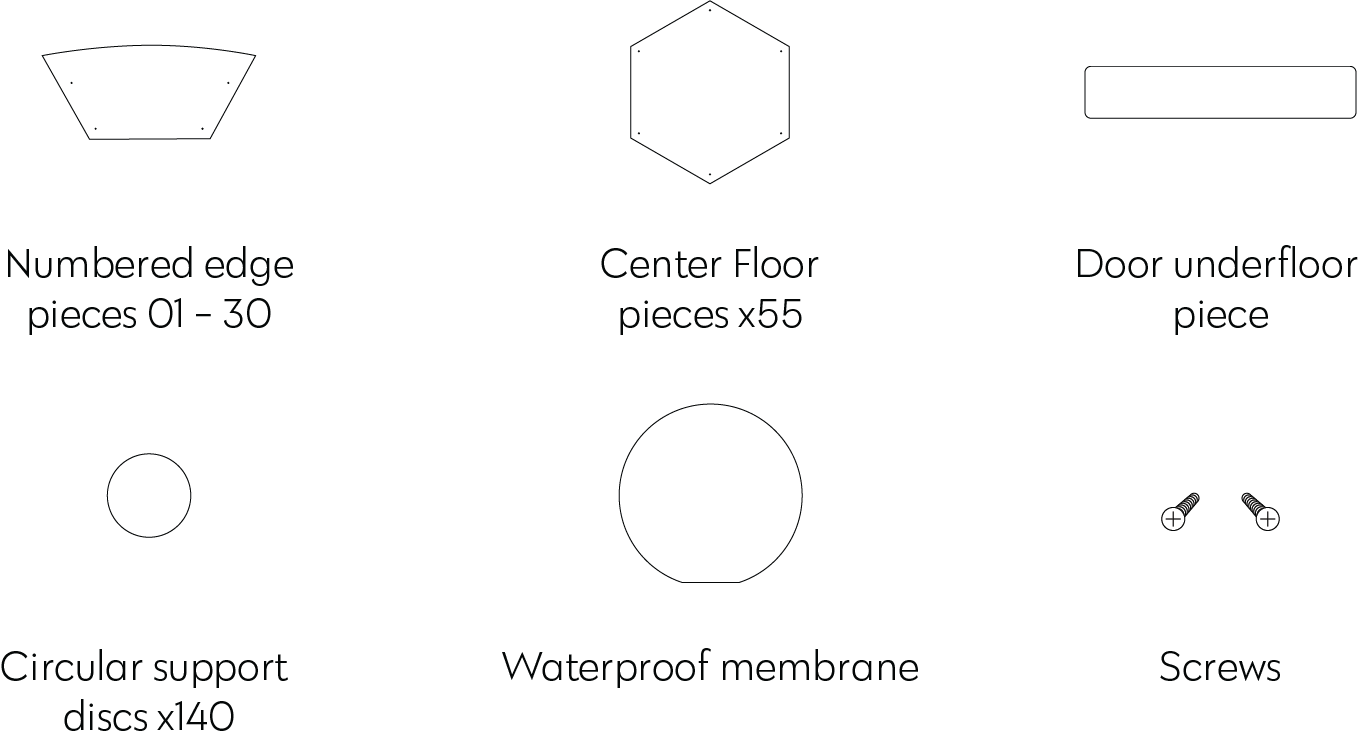
Unboxing
What's inside your boxes.
Tools you will need

Rubber Mallet

Electric Screwdriver/Drill
Title
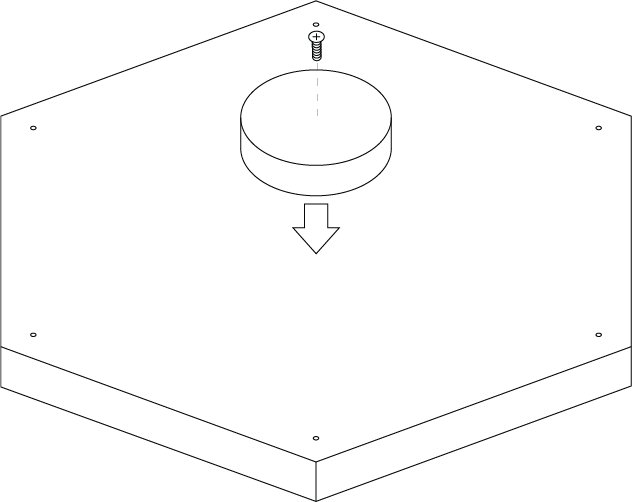
Assembly
How to build your flooring.
Preparing your space
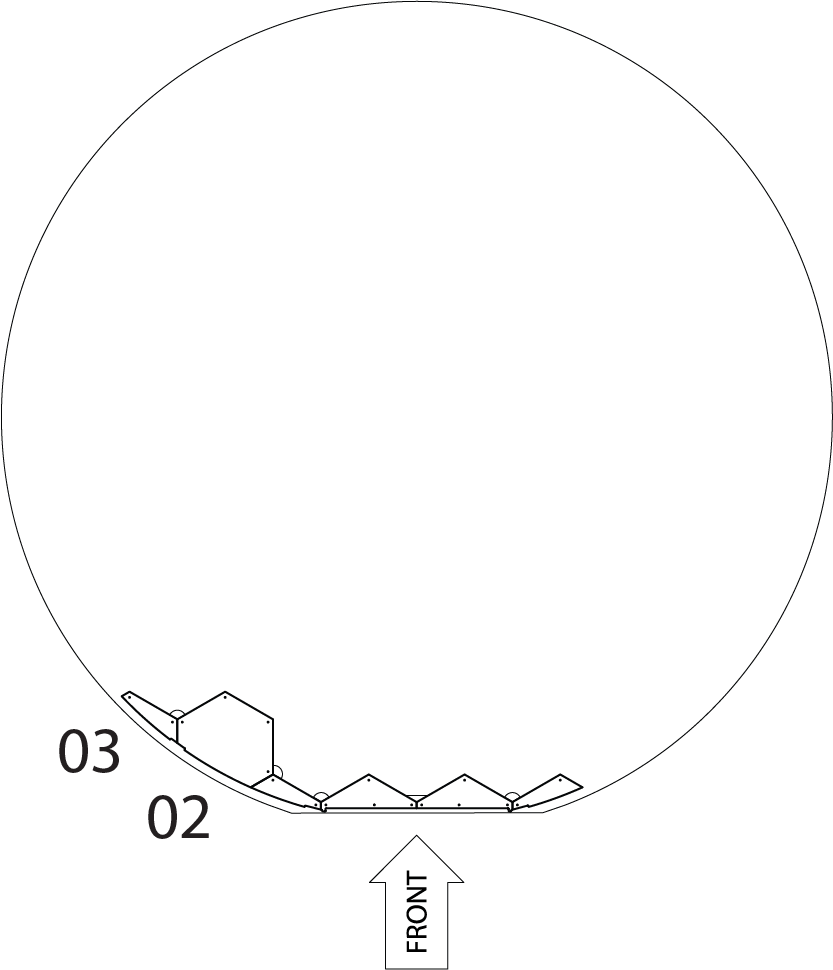
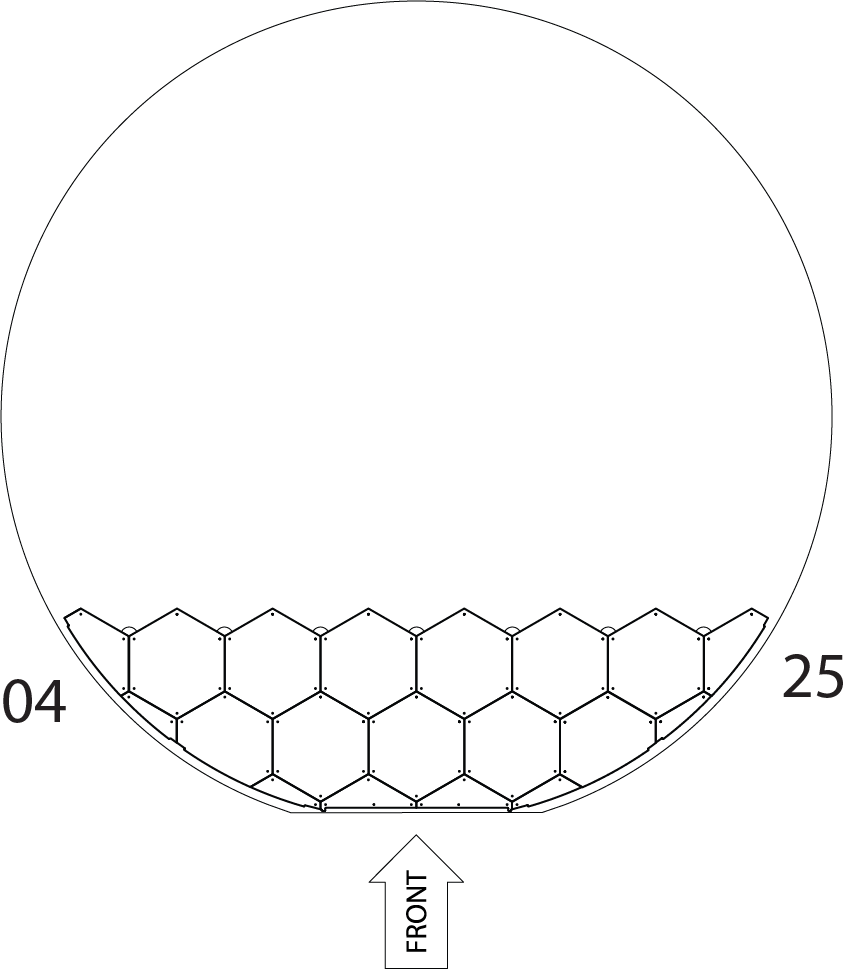
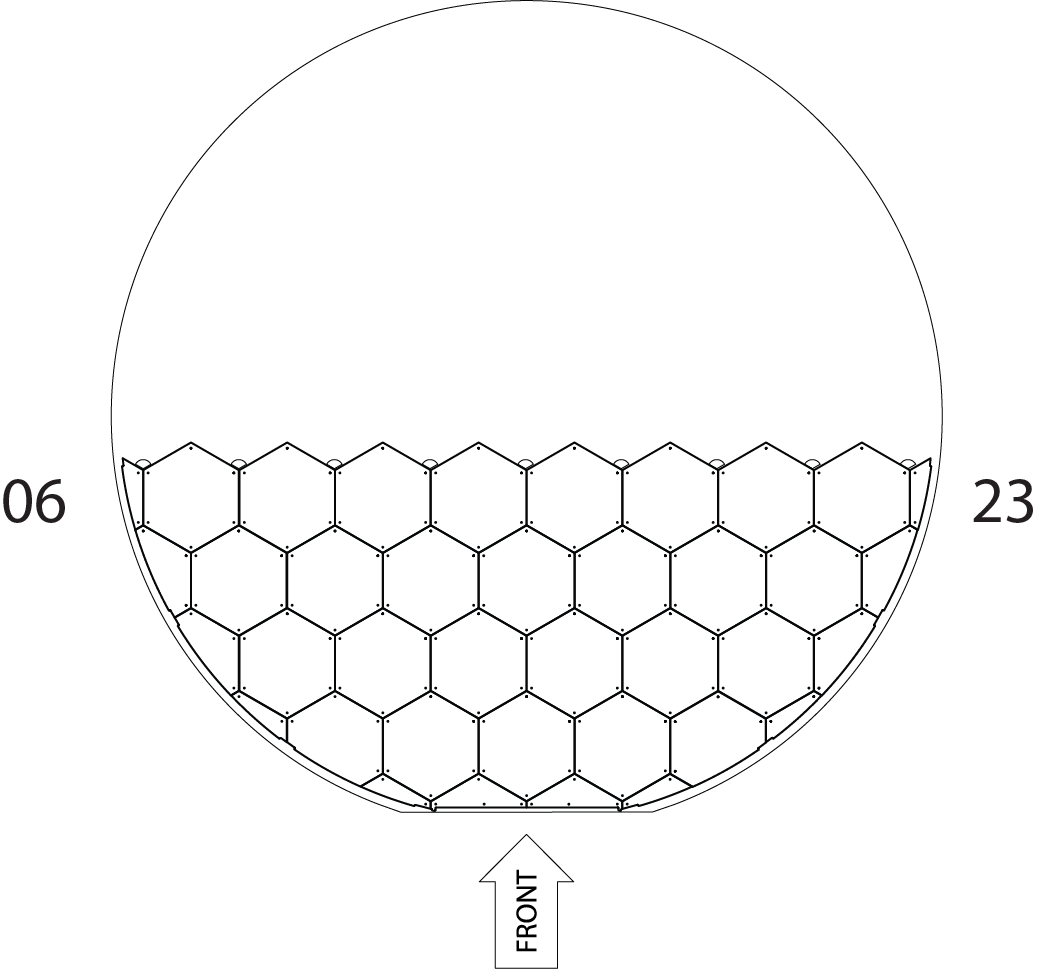
Step by step guidance


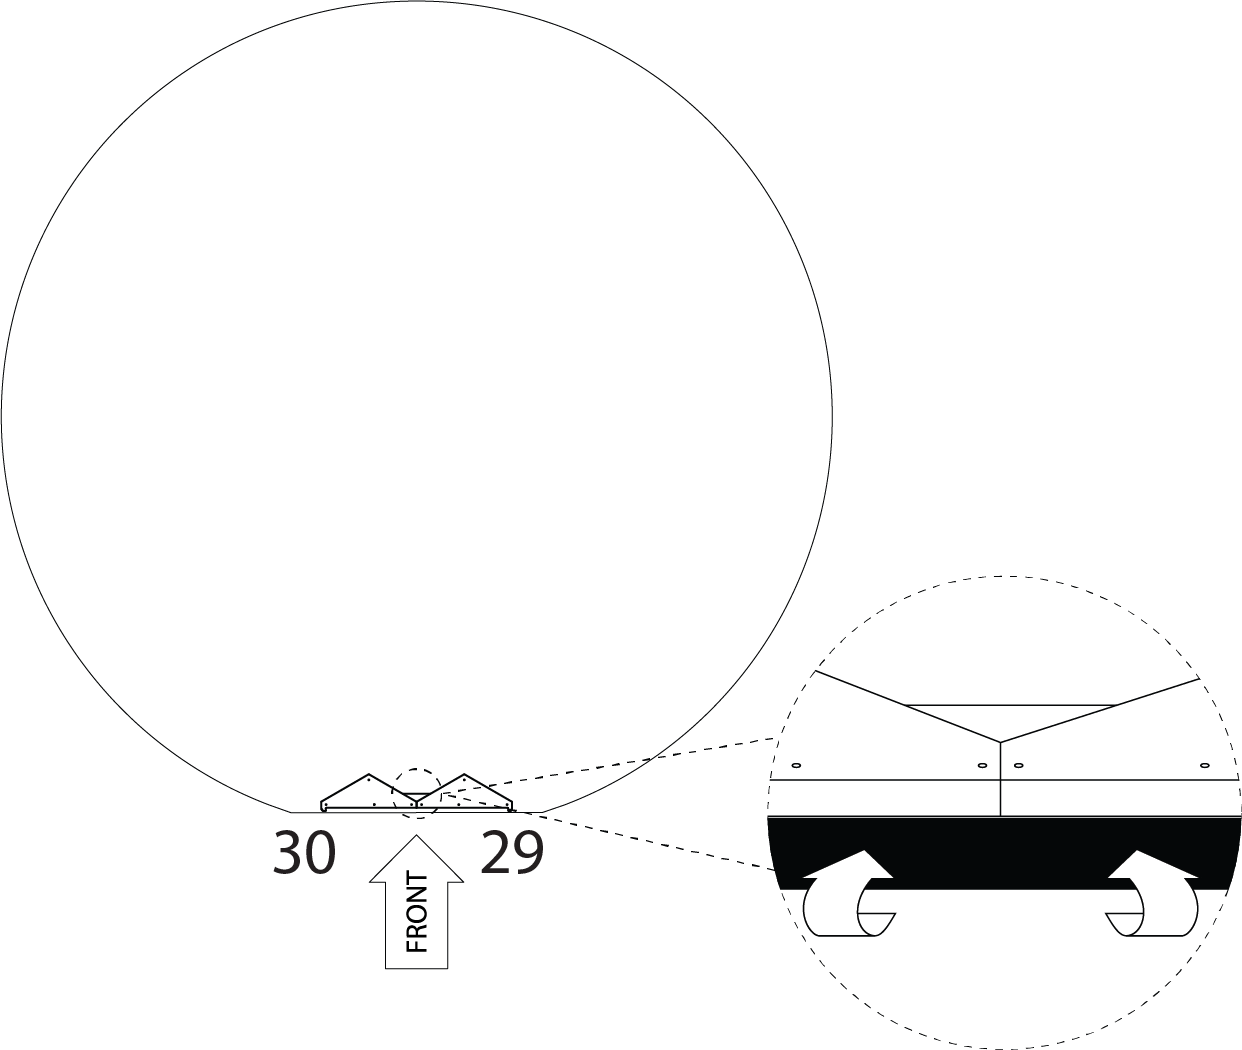
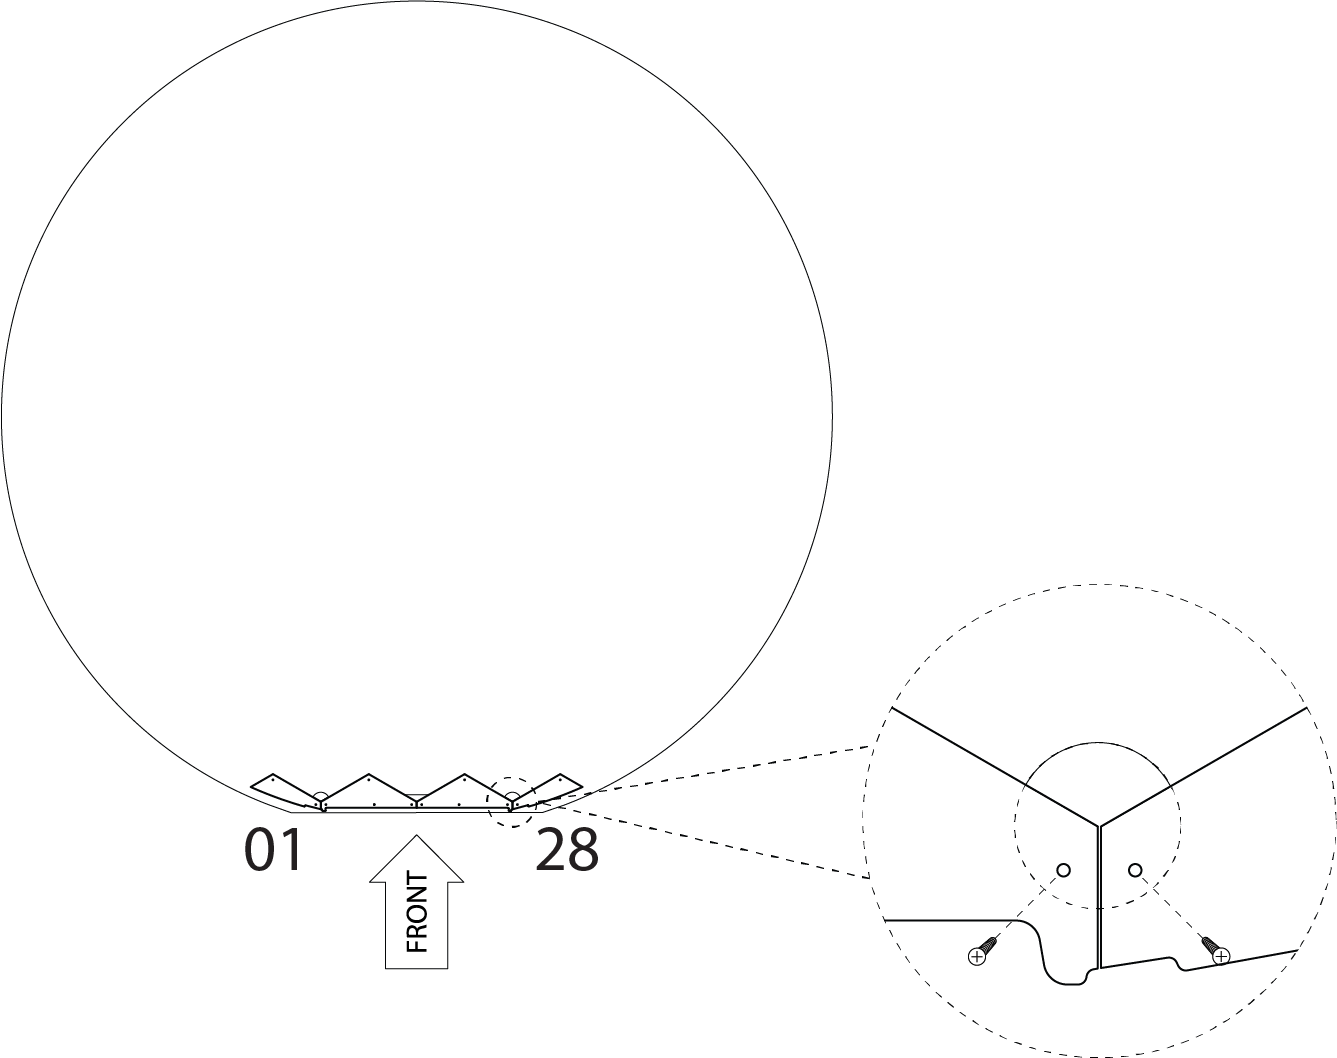


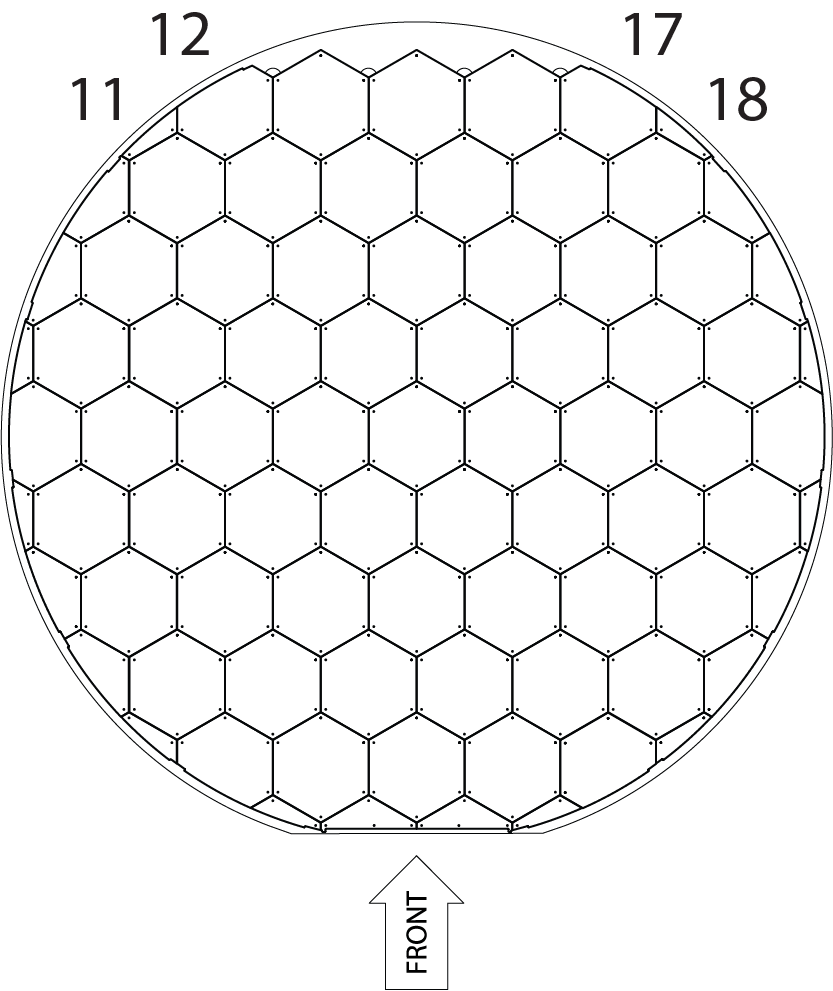


Anchoring Options for Your GeoDomeXL
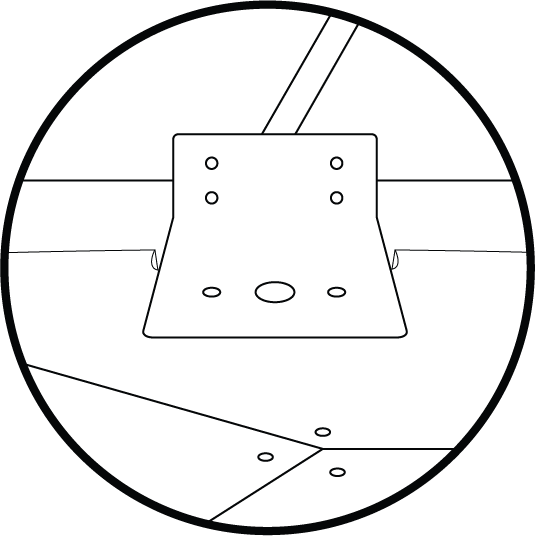
Brackets Under the Floor Panels
(Recommended for permanent setups)
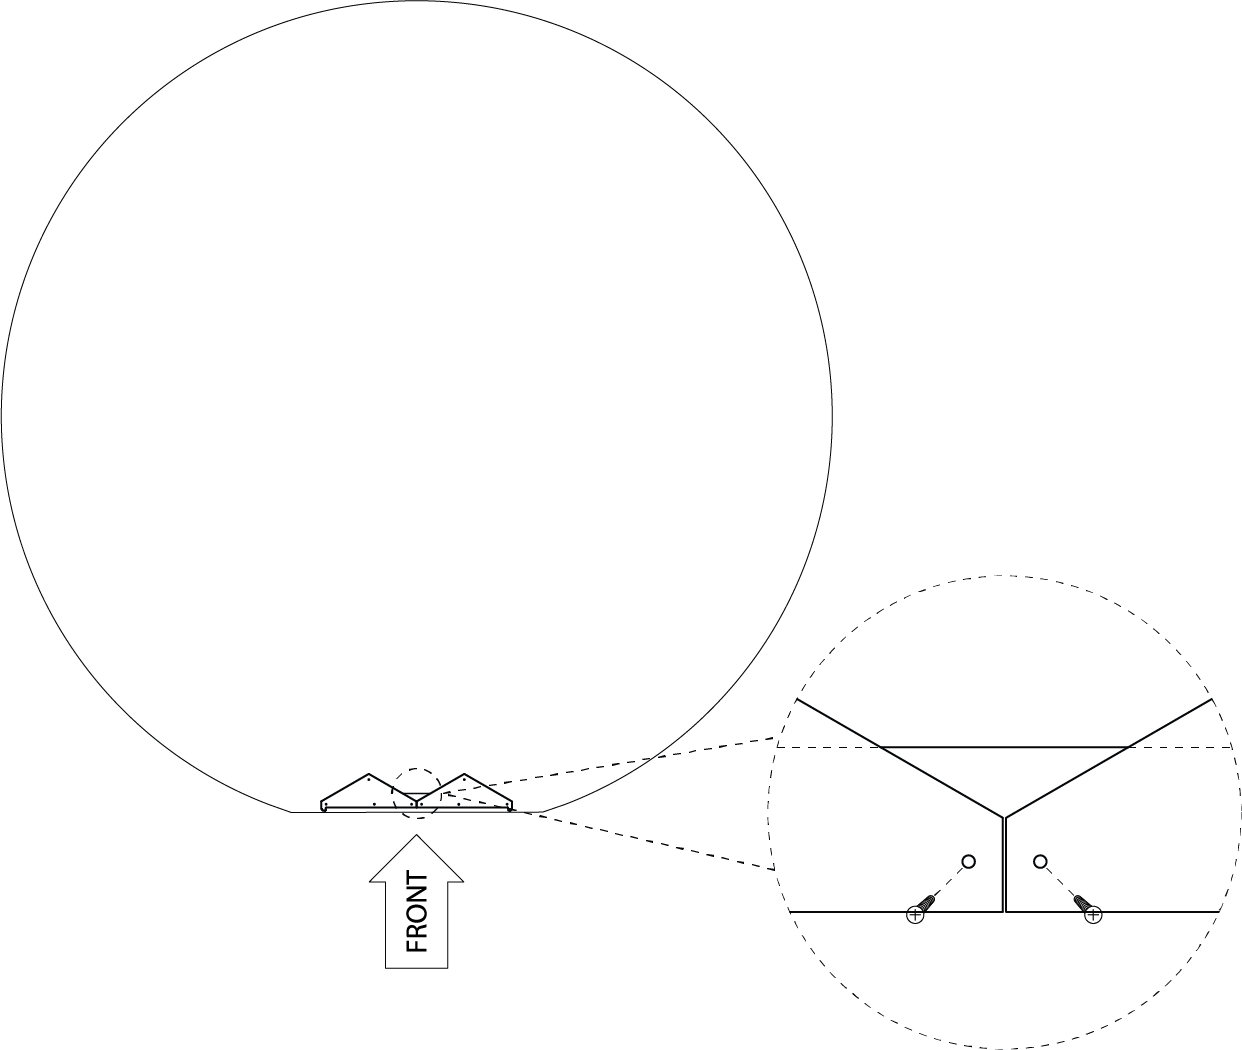
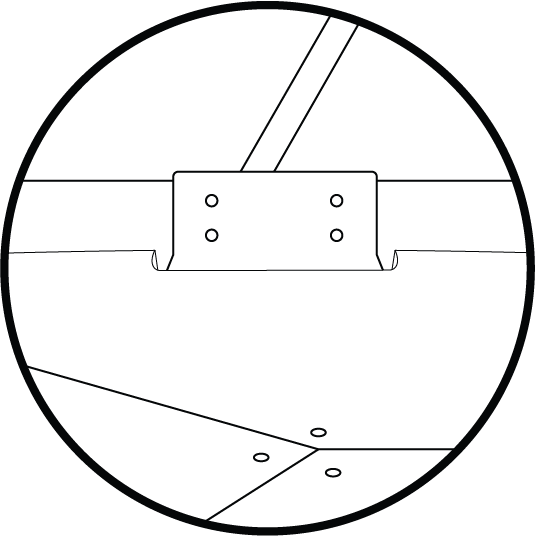
Brackets Above the Floor Panels
(Ideal for temporary setups)
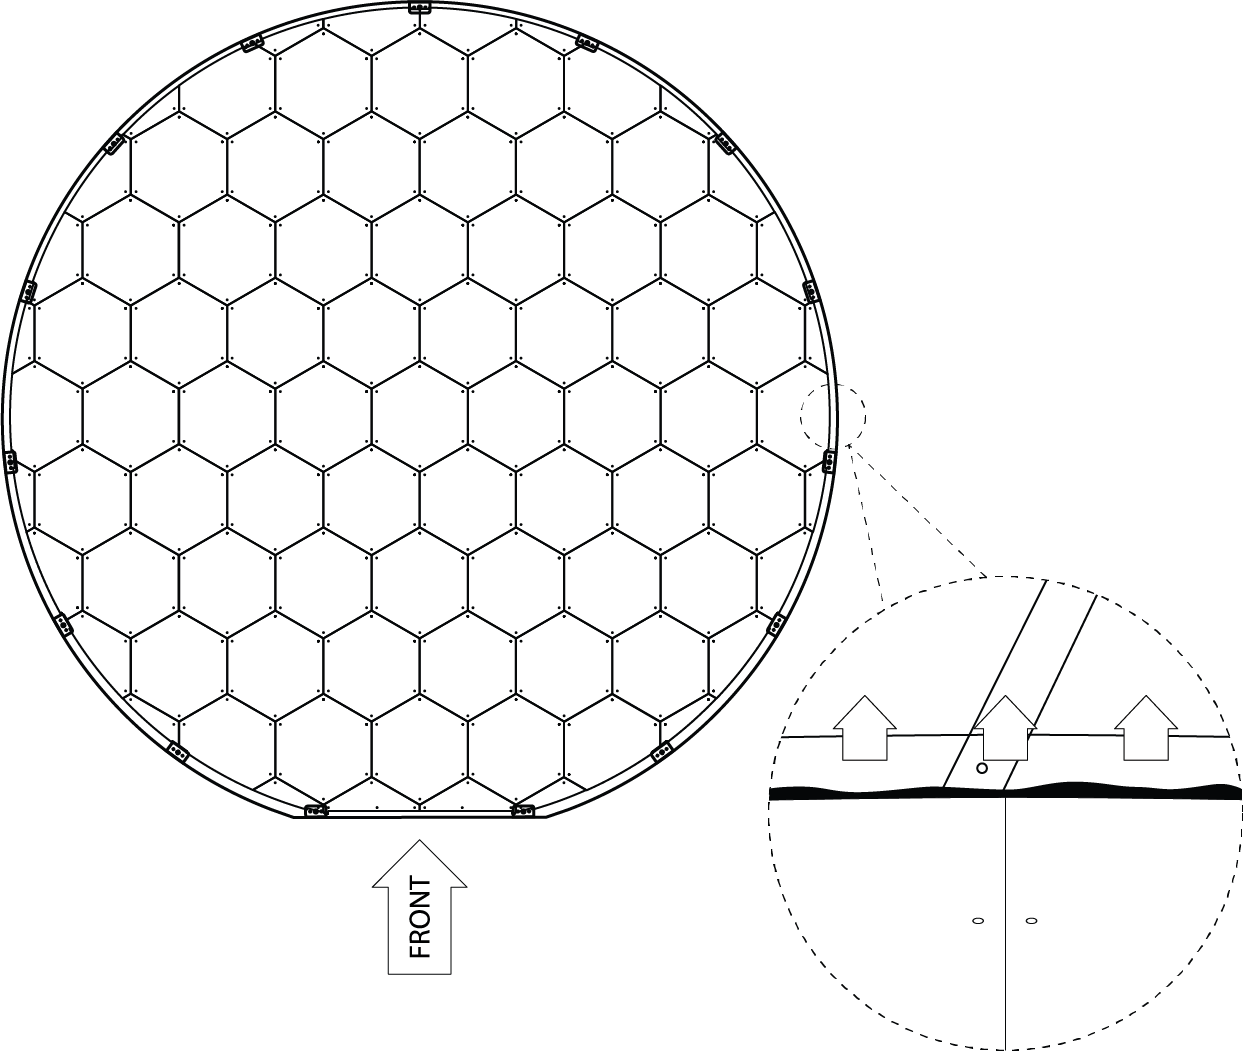
Brackets Outside the Dome
(Alternative option)

Title
Aftercare
How to look after your floor.
Prevention
Cleaning
Customisation
Storing or relocating
Title